B. Tech Himachal Pradesh Technical University for first Year
Each semester Lecture = 13, Practicle = 65Semester End Examination Max. Time = 3 hrs. Max. Marks: 100 Min. Pass Marks: 40
INSTRUCTIONS:
- For Institutes: There will be two sessions per week. 1st session will consist of one lecture and two hours of practice session. 2nd session will consist of three hours of practice session.
- For Paper Setters: The question paper will consist of five sections A, B, C, D & E. Section E will be compulsory, it will consist of a single question with 10-20 subparts of short answer type, which will cover the entire syllabus and will carry 20% of the total marks of the semester end examination for the course. Section A, B, C & D will have two questions from the respective sections of the syllabus and each question will carry 20% of the total marks of the semester end examination for the course.
- For candidates: Candidates are required to attempt five questions in all selecting one question from each of the sections A, B, C & D of the question paper and all the subparts of the questions in Section E. Use of non-programmable calculators is allowed.
Syllabus
SECTION-A
Drawing Techniques and Scales: Various type of lines, principal
of dimensioning, size and location as per IS code of practice (SP-46) for
general Engg. Drawing. Practice of drawing, various types of lines and
dimensioning exercises. Drawing exercises pertaining to symbols. Conventions
and Exercise of lettering techniques. Free hand printing of letters and numerals
in 3, 5, 8 and 12 mm sizes, vertical and inclined at 75 degree. Instrumental
lettering in single stroke. Linear scale, Diagonal scale &vernier scale.
Points, Lines and Planes: Projection of Points, Lines and
Planes: Concept of horizontal and vertical planes. First and third angle
projections: projections of point and lines, true length of lines and their
horizontal and vertical traces, projection of planes and their traces.
Auxiliary planes.
SECTION-B
Projections of Solids: Right regular solids of
revolution and polyhedrons etc. and their auxiliary views.
Sectioning of Solids: Principal of sanctioning, types
of sanctioning and their practice on projection of solids, sectioning by
auxiliary planes.
SECTION-C
Development of Surfaces: Development of surfaces of
cylinders, cones, pyramid, prism etc. exercises involving development of unique
surfaces like Y-piece, hopper, tray, truncated pieces etc.
Intersection of Surfaces: Intersection of cylinders, cones
and prisms with their axes being vertical, horizontal or inclines. Exercise on
intersection of solids-cylinder and cylinder, cylinder and cone, prism and
prism.
SECTION-D
Isometric Projection: Concept of isometric views:
isometric scale and exercise on isometric views. Practice of Orthographic
projections.
Simple Trusses: Graphical Method.
TEXT BOOKS:
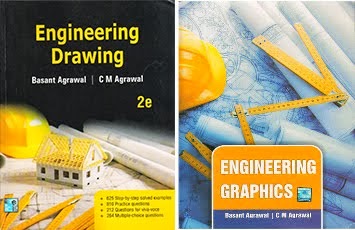
- Engineering Drawing, Agrawal and Agrawa, Tata McGraw Hill Publishing Co. Ltd.
- Engineering Drawing & Engg. Graphics by P. S. Gill, Kataria and Sons Millennium Edition.
- Engineering Drawing Plane and Solid Geometry by N.D. Bhatt and V. M. Panchal, 44th Edition, 2002, Charotar Publishing House.

